


Tiled Kitchen Backsplashes: Dimensions, Materials, and Installation
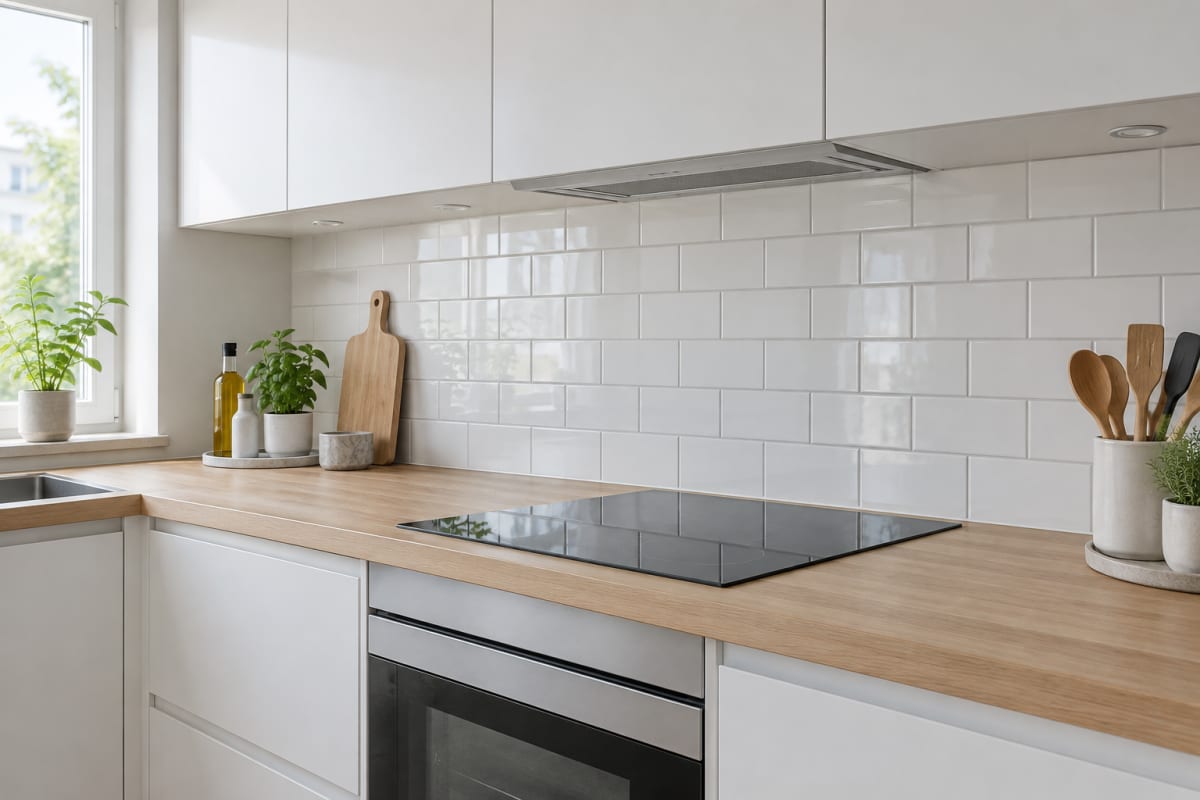
Did you know that an average kitchen backsplash covers a mere 2 to 4 square meters? Despite its compact footprint, this hardworking stretch of wall is where minor mistakes—like choosing the wrong adhesive, grout, or sealant—cause the most noticeable, long-term headaches.
Whether you are updating an existing layout or designing a new kitchen from scratch, here is an architect- and installer-tested guide to sizing, material selection, and installation to ensure your tiled backsplash remains stunning and easy to maintain for years to come.
Key Takeaways:
- Height: Standard clearance between countertops and upper wall cabinets is 50–60 cm, establishing the primary tiling band.
- Tile Choice: Standard glazed ceramic wall tiles are budget-friendly and practical. Denser porcelain tiles deliver ultimate durability but require a high-bond adhesive.
- Tile Adhesive: Specify at least a Class C1 mortar; upgrade to Class C2 (typically C2TE S1) for porcelain tiles, large formats, or tiling over existing tile.
- Grout: Conventional cementitious grout performs reliably when sealed, but non-porous epoxy grout behind sinks and cooktops delivers unmatched stain and grease resistance.
- Perimeter Joints: Never bridge internal corners or the countertop-to-tile transition with hard grout. Always fill these movement joints with 100% silicone sealant.
- Overage: Factor in a 10% waste buffer for straight or running bond layouts, and increase to 15% for diagonal or herringbone patterns.
Measuring the Area and Setting the Height
The backsplash defines the vertical wall zone between your worktops and the base of your wall-hung cabinets. Standard countertop heights sit between 85 and 95 cm above finished floor level, with the underside of upper cabinets typically positioned 50 to 60 cm higher. This creates a neat horizontal band approximately half a meter high that runs the length of your cabinetry.
The cooking zone demands tailored planning. Range hood manufacturers typically recommend a minimum vertical clearance of 60 cm above electric or induction cooktops, and between 65 and 75 cm above gas burners. When the hood sits higher than the adjacent cabinetry, extend the tile up behind it—either stopping flush with the hood’s underside or continuing all the way to the ceiling for a cohesive, architectural look. Always verify the clearances listed in your appliance manual before setting your layout.
Design Rule of Thumb: If your kitchen features open floating shelves or dispenses with upper cabinets entirely, run your tile up at least 50–60 cm from the worktop across the entire run. This mimics the visual baseline of traditional cabinetry while shielding bare drywall from grease and water splatters.
Choosing the Right Tile for a Kitchen Backsplash
Under the European EN 14411 standard, tiles are categorized by their water absorption capacity: Group BIa (absorption ≤ 0.5%) includes dense porcelain stoneware; Group BIb (0.5–3%) encompasses vitrified ceramics; and Group BIII (> 10%) consists of traditional glazed ceramic wall tiles. Because backsplashes are non-load-bearing, protected by a surface glaze, and never exposed to freezing outdoor conditions, water absorption is far less critical here than on wet-room floors. Standard ceramic tiles remain an outstanding, cost-effective choice for kitchen walls.
| Material | Key Advantages | Practical Considerations |
|---|---|---|
| Glazed Ceramic Wall Tile | Lightweight, effortless to cut, and available in endless colors and shapes | More porous core than porcelain; strictly engineered for wall applications |
| Porcelain Tile (BIa) | Ultra-dense, impact-resistant, and ideal for large formats | Vitrified body requires a high-performance C2 adhesive and thorough substrate prep |
| Glass Mosaic | Completely non-porous, highly reflective, and stain-proof | Brittle to cut; requires a high density of grout lines and meticulous alignment |
| Natural Stone (e.g., Marble) | One-of-a-kind veining and high-end organic appeal | Vulnerable to acidic substances like lemon juice and vinegar; penetrating sealers reduce staining but cannot stop acid etching |
If you admire the luxury of natural veining without the upkeep of soft stones, consider marble-look porcelain or ceramic alternatives. Authentic natural stone tiles are best suited for those who embrace natural patina and commit to routine re-sealing. For darker or more compact spaces, glass mosaic tiles bounce task lighting back into the room. For more styling inspiration, read our guide on using glass mosaics in interior design.
Finish also influences your daily routine: high-gloss glazes wipe clean with minimal effort, whereas matte finishes excel at disguising water droplet marks and fingerprints. Compare the nuances in our deep dive on glossy, semi-matte, and matte tile surfaces.
Tile Formats and Layout Patterns
Because backsplash height is relatively compact, tile dimensions dictate how many cuts you will need to execute and where those cut lines ultimately land.
- Square Formats (10×10 cm, 15×15 cm): A timeless, forgiving option on walls with slight undulations. A clean baseline example is the Rako Color One white gloss 15×15 tile.
- Subway Tiles (10×20 cm, 7.5×15 cm): Versatile classics suited to brick-bond, stacked, or herringbone orientations. Look to the Seramiksan Metro White 10×20, sold in convenient 0.8 m² cartons.
- Elongated Field Tiles (5×25 cm, 10×30 cm): Help visually stretch a galley kitchen or compact run. Standout selections include Seramiksan Glossy White 10×30 and Ceramica Da Vinci Trendy Blanco 5×25.
- Medium Formats (30×60 cm): Fewer grout joints produce a crisp, uncluttered aesthetic. The Rako White 30×60 matte rectified tile is an ideal candidate.
- Large-Format Slabs (60×120 cm): Deliver a virtually seamless, stone-slab impression. They require perfectly flat walls, a two-person installation team, and flexible mortar, such as with La Platera Kore Pearl-D 60×120.
A true herringbone pattern requires rectangular tiles whose length is an exact multiple of the width (such as 10×20 cm or 7.5×15 cm); irregular aspect ratios disrupt the interlocking geometry. Herringbone also demands a precise center line and creates substantial waste along edges and cabinets, so order plenty of extra material.
Common Pitfall: Using a 60 cm tall slab tile to fill a 55 cm cabinet clearance forces you to rip down every individual tile lengthwise, leaving raw cut edges running right under your wall cabinets. If you have a 55 cm reveal, consider setting 30×60 cm tiles vertically or choosing modular dimensions that divide neatly into full rows.
Explore our full curated range in the tiles catalog, or bring your countertop and cabinetry samples to our showroom to verify undertones under real-world lighting.
Calculating Tile Quantities: A Practical Example
Assume you have a 3.2-meter linear kitchen run with a 55 cm clearance between worktop and upper units.
- Calculate net square meters: 3.2 m × 0.55 m = 1.76 m².
- Add standard waste (10% for straight or running bond): 1.76 × 1.10 = 1.936 m² (round up to 1.94 m²).
- Determine cartons needed: If using Seramiksan Metro White (0.8 m² per box): 1.94 ÷ 0.8 = 2.4 boxes. Round up to order 3 full boxes (2.4 m² total).
- Adjust for herringbone (15% waste): 1.76 × 1.15 = 2.02 m², which still comfortably falls within the 3-box order.
Do not discard leftover full tiles. Store an unopened or partial carton in a dry spot. If a tile chips down the line or plumbing modifications require opening the wall, sourcing an identical shade variation and production caliber can prove nearly impossible.
If your backsplash steps up to the range hood, measure that projection separately (e.g., 0.6 m wide × 0.3 m high = 0.18 m²) and factor it into your overall square meterage.
Substrates, Adhesives, and Grout
Substrate Preparation
A crisp, planar tile installation hinges entirely on what lies underneath. Thin-set standards require wall flatness within a 3–4 mm tolerance under a 2-meter straightedge. Deep hollows or ridges must be filled and leveled in advance—never use excessive adhesive thickness to bridge structural discrepancies.
- Drywall: Ensure walls are framed with boards at least 12.5 mm thick (preferably 15 mm for structural rigidity behind heavy tile). Dust the surface clean and prime thoroughly.
- Plaster and Masonry: Under Knauf application standards, prime the surface and confirm that residual substrate moisture is below 1% before applying cementitious mortar.
- Tile-Over-Tile Installations: You can set new tile over old tile, provided the existing layer is structurally sound, level, clean, and dry. Tap every tile with a wooden mallet; any loose or hollow-sounding pieces must be removed and patched. Degrease thoroughly to strip away cooking oils, then apply a specialized bonding primer formulated with quartz aggregate for non-porous surfaces.
Understanding Adhesive Ratings (EN 12004)
The alphanumeric designations on mortar packaging specify its technical performance:
- C1: Standard cementitious adhesive (tensile adhesion strength ≥ 0.5 N/mm²). Suitable for smaller ceramic wall tiles on drywall, but unsuitable for formats larger than 30×30 cm.
- C2: High-performance cementitious adhesive (tensile adhesion strength ≥ 1.0 N/mm²). Recommended for porcelain, tile-over-tile applications, and tiles up to 60×60 cm.
- T (Thixotropic): Slip-resistant formula that prevents tiles from slumping down vertical surfaces before setting. Essential for backsplashes.
- E (Extended Open Time): Provides at least 30 minutes of working time on the wall instead of the standard 20 minutes.
- S1 / S2 (Deformability): Indicates lateral flexibility. Leading manufacturers like Mapei specify S2-grade mortars for slimline, large-format porcelain slabs.
Because vitrified porcelain absorbs practically zero water, it cannot form a purely mechanical bond. It always requires a polymer-modified C2-rated adhesive to guarantee chemical adhesion.
Grout and Silicone Sealant
Under the EN 13888 standard, cementitious grouts are designated CG1 and CG2, while reactive epoxy formulas carry the RG classification. Suffixes denote specialized characteristics: "W" designates reduced water absorption, while "A" specifies superior abrasion resistance.
Standard cementitious grout remains inherently porous and will pull in cooking oils unless properly sealed. Apply a penetrating grout impregnator 24 to 48 hours post-installation. Epoxy grout, conversely, is completely non-porous, acid-proof, and stain-resistant without secondary sealers, though it requires roughly seven days to reach full chemical cure.
Dependable choices include cementitious Ceresit CE-40 Aquastatic grout and resin-based Ceresit CE-89 epoxy grout.
The #1 Installation Mistake: Filling the junction between the countertop and the bottom tile row with standard grout. Countertops, cabinets, and walls move independently with seasonal humidity and load changes; hard grout in this corner will crack and crumble within months. Always maintain a 3 mm gap and pack it with color-matched sanitary silicone. The same rule applies to inside corners where adjacent walls meet.
Step-by-Step Installation
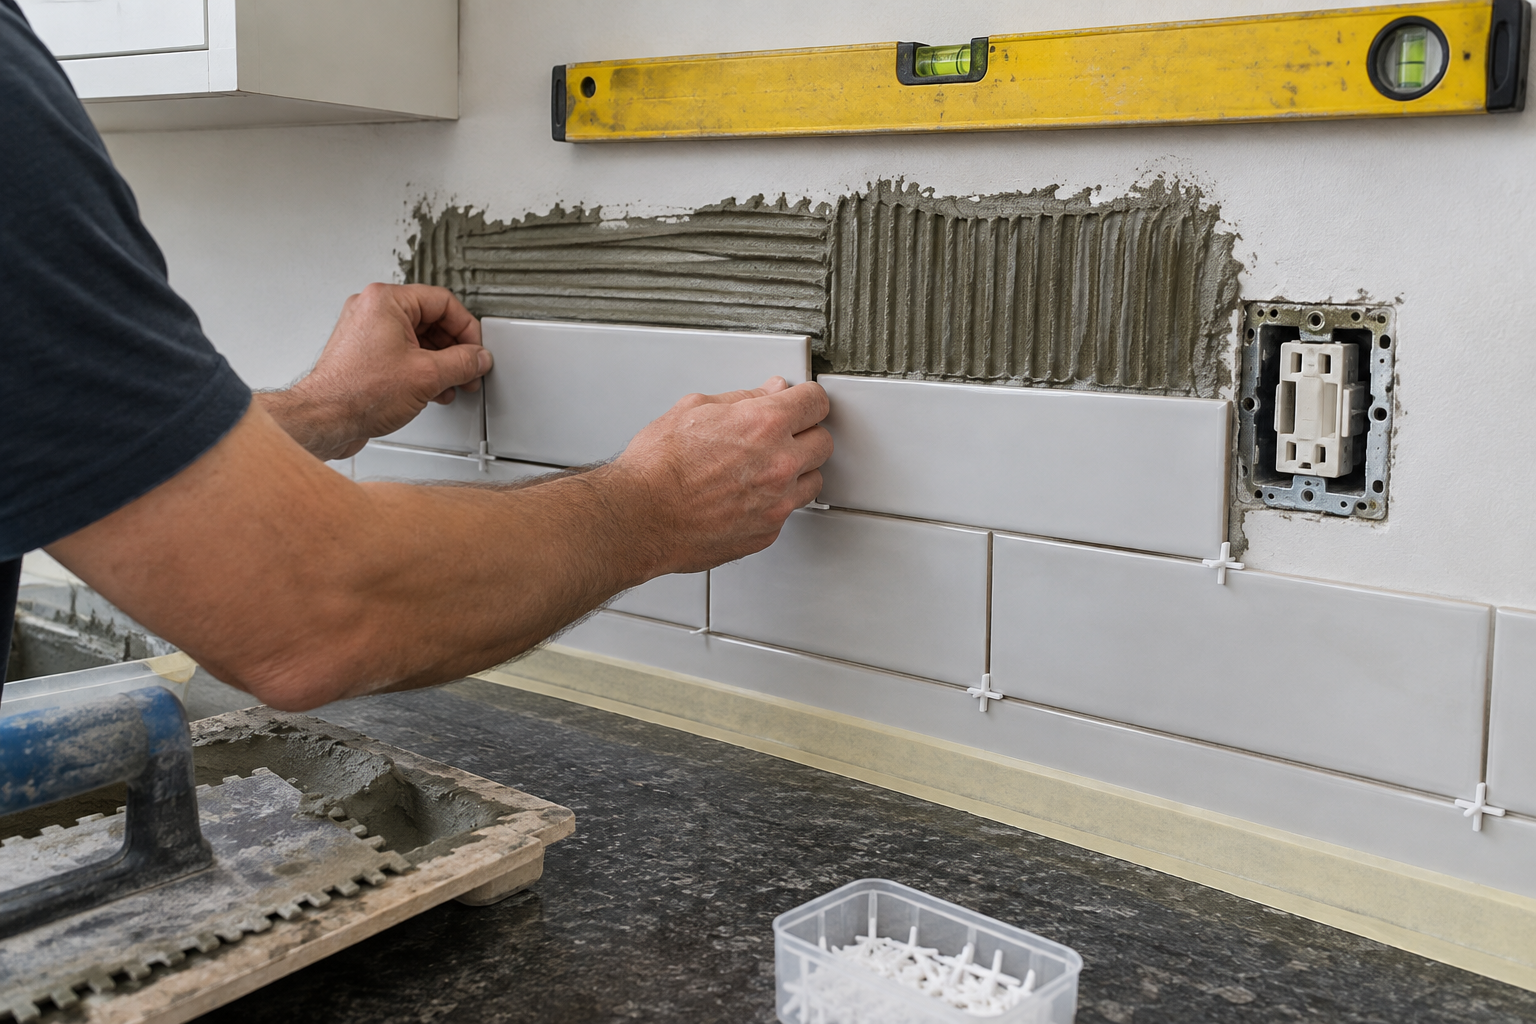
- Isolate the electrical circuits at your service panel and unscrew existing outlet plates. Protect countertops and base units with drop cloths and low-tack protective tape.
- Find the low point of the countertop. Set a full reference tile at that lowest point resting on a 3 mm spacer, mark the top edge, and shoot a level horizontal laser line across the workspace.
- Plan for full tiles directly off the counter. Starting with a full tile at the countertop ensures any fractional cuts remain tucked under the upper cabinets, well out of direct eye level. Fix a straight ledger board underneath if your counters are not yet installed.
- Key in the adhesive with a notched trowel. Comb out only as much mortar as you can comfortably tile before it skins over. Set tiles using a slight twisting motion to collapse the ridges, using cross spacers to maintain uniform joint widths.
- Carefully cut out electrical penetrations. Cut openings so outlet cover plates overlap the edges cleanly while leaving junction box mounting lugs accessible. If tiles set the box face too deep into the wall, install UL-listed box extenders.
- Allow the adhesive to cure completely according to the manufacturer's technical data sheet before attempting to grout.
- Grout the tile field. Press grout into joints using a rubber float held at a 45-degree angle. Clean away residue with a lightly damp cellulose sponge, ensuring inside corners and the countertop junction remain completely clear of mortar.
- Tool silicone into perimeter joints. Apply sanitary silicone along the countertop perimeter and vertical internal corners. Once dry, treat cementitious grout with an impregnating sealer if specified.
For detailed advice on cutting methods, substrate leveling, and cleaning routines, check out our definitive guide to installing and maintaining ceramic tiles.
When to Call a Professional: Consider hiring a certified installer if you are handling large-format porcelain slabs, complex herringbone layouts, out-of-plumb walls, or complicated electrical re-routing. Always leave wiring adjustments to a licensed electrician.
Installation Costs in Estonia
According to cost benchmarks from Remondikalkulaator.ee, backsplash labor rates in 2026 range from €35–€55/m² for straightforward ceramic layouts, rising to €55–€85/m² for intricate mosaics, tight patterns, or large porcelain slabs. For a typical ~4 m² kitchen backsplash, total professional labor usually tallies between €260 and €820, with Remonditurg.ee reporting an average accepted project cost of €463.
Because the square meterage is small, tiling estimates reflect setup time, precision cuts around sockets, edge trims, and wall prep rather than sheer area. Substrate skimming, board replacement, or applying epoxy grout will carry independent labor surcharges. We outline a comprehensive breakdown in our guide on how much bathroom tiling costs—the same budgeting principles apply directly to kitchens.
Maintenance: Keeping Grout Lines Clean and Bright
- Wipe down the backsplash regularly using warm water and a pH-neutral cleaner.
- Strip cooking oil splatters promptly using a specialized alkaline degreaser. Never clean cementitious joints or polished marble with acidic descalers, which dissolve the cement matrix and etch stone finishes.
- If you opt for cement grout behind a cooking range, refresh the penetrating sealer annually.
- For high-splatter zones behind cooktops and sinks, lean toward medium-to-dark grout shades or epoxy formulas; bright white cementitious grout requires ongoing vigilance to avoid grease discoloration.
Planning a broader property overhaul? Walk through our end-to-end kitchen renovation guide for budgeting, scheduling, and trades coordination.
A long-lasting kitchen backsplash comes down to three choices: selecting a tile format that divides cleanly into your cabinet height, choosing an adhesive formulated for your specific tile body, and honoring expansion joints with silicone. Measure your wall clearances, explore our hand-picked ceramic tile collection, or visit our showroom with your finish samples to find the ideal combination for your home.