


Cutting Tiles Accurately and Without Chipping: A Practical Guide
Chipped edges and unexpected breaks can turn a straightforward tiling project into a frustrating and expensive headache. However, with the right cutting tools and proper technique, you can produce crisp, professional edges every time while keeping costly material waste to a minimum.
Choosing Tools by Tile Material and Type
Different tiling materials react very differently to cutting. To achieve clean, chip-free cuts, match your cutting equipment directly to the tile’s density, hardness, and thickness.
Standard Ceramic and Wall Tiles
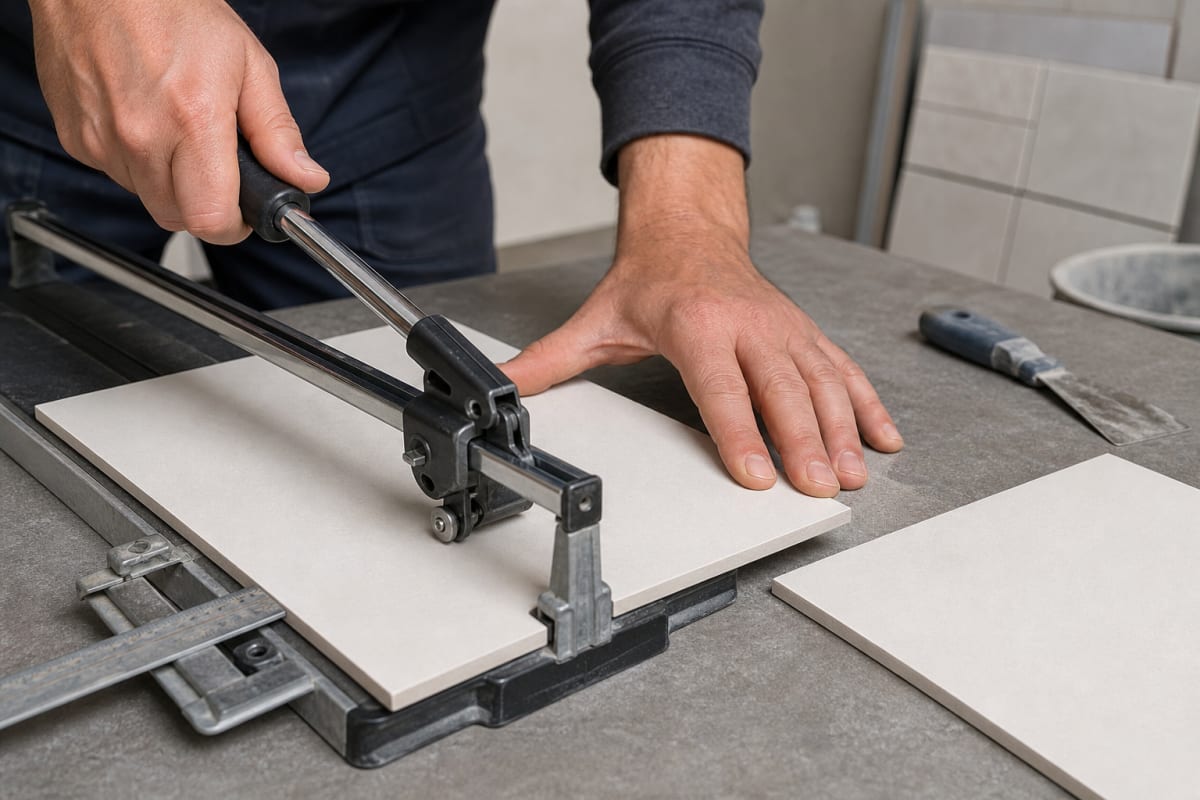
For standard ceramic wall tiles—such as the versatile Seramiksan Matte White 20x20 or the classic Rako White 30x60—a manual score-and-snap cutter is usually the fastest and cleanest choice. A tungsten carbide scoring wheel scores an even line across the glazed surface, after which the built-in breaker bar applies balanced pressure to snap the tile cleanly along the score line.
Explore a wide range of wall and floor options in our ceramic tiles collection.
Full-Body and Porcelain Tiles
Porcelain tiles are fired at higher temperatures, making them exceptionally dense and tough. For large-format and heavy-duty porcelain options like Moon Dark Grey 60x60 or the striking Arcana Stracciatella 80x80, a water-cooled wet tile saw is the best approach. A continuous-rim diamond blade paired with steady water cooling prevents friction-induced overheating, eliminating the rough chipping common with dry cutting methods.
Natural Stone (Granite, Slate, Sandstone)
Natural stone demands dedicated cutting power and continuous water lubrication. Dense materials like White Beauty granite tile or irregular Akrolithos slate must be wet-cut using a diamond blade. The water stream prevents the stone from crumbling along the cut line while suppressing harmful airborne silica dust.
Learn more about selecting and caring for natural stone in our guide to natural stone tiles for interior finishing, or browse our complete catalog of natural stone tiles.
Mosaics and Geometric Specialty Shapes
Mesh-backed glass sheets and delicate ceramic mosaics require compact cutting tools for precise control. Handheld tile nippers and small angle grinders are essential here. For intricate patterns or geometric designs—such as the hexagonal Mayolica Essence Hexagon or the mesh-mounted Soap Stone black mosaic—tile nippers allow you to trim individual pieces to fit tightly around corners and fixtures. Discover our extensive selection of glass mosaic tiles.
Techniques for Straight and Angled Cuts Without Chipping
Flawless tile edges rely on consistent scoring pressure, controlled cutting speed, and proper edge finishing.
- Marking the Cut Line: Measure accurately and mark your layout lines clearly using a pencil or fine-tipped grease pen.
- The Single-Score Rule for Manual Cutters: When using a manual cutter, glide the scoring wheel across the glaze in one single, continuous, and confident stroke. Repeatedly scoring the same line damages the glaze and creates jagged, uneven breaks.
- Controlling the Feed Rate on Wet Saws: Let the diamond blade cut at its own pace without forcing the tile forward. Ease up on the feed pressure over the final centimeter of the cut to prevent the trailing corner from snapping off.
- Back-Cutting Fragile Glazes: For brittle glazes prone to chipping at the exit point, make a shallow preliminary cut (a back-cut) a few millimeters into the far edge before cutting through the full length, or take multiple shallow passes.
- Dressing Cut Edges: Smooth minor imperfections or sharp edges after cutting using a diamond hand polishing pad or 100–220 grit wet/dry sandpaper.
Complex Cuts: L-Shapes, Curves, and Pipe Holes
Plumbing fixtures, drain lines, and door thresholds frequently require specialized cutouts rather than straight edge-to-edge cuts.
- L-Shaped Corner Cuts: Use an angle grinder fitted with a continuous-rim diamond blade. Score and cut along both intersecting lines from the edge inward until they meet neatly at the inside corner. Avoid prying the cutout piece loose before the cuts meet fully, as this can snap the tile body.
- Circular Penetrations for Pipes and Outlets: Use a diamond core drill bit or hole saw attachment. Mark the exact center of the hole, place a piece of masking tape over the spot to prevent the bit from wandering, and drill at moderate speed while keeping the contact area well-lubricated with water.

Safety and Wet Cutting Best Practices
Cutting tiles generates fine dust and sharp fragments, while wet saws introduce water around electrical machinery. Always keep safety at the forefront of your workflow.
- Dust Management: Wet cutting significantly reduces airborne crystalline silica dust. If dry cutting with an angle grinder is necessary, connect an active dust-extraction vacuum or work in a well-ventilated outdoor setting.
- Personal Protective Equipment (PPE): Always wear impact-resistant safety glasses, ear protection, and sturdy work gloves. Position your workpiece so grinding sparks and debris fly away from your body.
- Electrical Safety: Plug wet-cutting tools exclusively into GFCI/RCD-protected outlets. Keep all extension cords, plugs, and connections completely dry and off damp floors.

Material Allowance and Installation Preparation
Even with expert cutting techniques, some breakage and trimming waste are inevitable. For standard grid or brick patterns, add a 10% waste buffer to your total square footage; for complex herringbone or diagonal layouts, budget for a 15% overage.
For complete guidance across every stage of your renovation, explore our other practical tiling resources:
- How to plan your ceramic tile purchase
- Comprehensive guide to ceramic tile installation and maintenance
- Bathroom waterproofing under tiles
- How much bathroom tiling costs
- Choosing ceramic tiles for your home
Equipped with the right tools and proper cutting methods, you can achieve clean, professional results on any tiling job. Explore Vipex's comprehensive range of tiles, or visit our showroom in Tallinn to view samples in person and get expert advice tailored to your project.